Sunday, January 24, 2010

Savory coconut milk soup

This is an improvised soup that turns out a little different each time I make it. Here's what this weekend's edition turned out like.

Ingredients:
Vegetable stock
Coconut milk
Diced onion
Minced garlic
Diced shallot
Red potatoes cut into cubes
Chopped carrots
Diced green pepper
Shredded savoy cabbage
Sliced shitake mushrooms
Sliced crimini mushrooms
Extra firm tofu cut into cubes
Water chestnuts
Cilantro
Cooked brown rice
Sriracha hot sauce

First, I put a little oil in the pot and sauted the onions and garlic for a couple minutes. Then, I added the vegetable stock and cooked the potatoes and carrots for about 10 minutes on their own. When the potatoes were tender I added the rest of the veggies and tofu.


Finally, I added coconut milk, more vegetable stock, and cooked rice and let it all simmer on the stove.


(In the past, I have served the rice separately and then poured the soup over top. This time I just added it in the soup because I only had about 1/2 cup of rice in the pantry.)

Kimchi

This is a really easy recipe for kimchi. It is different from other types of kimchi that I have eaten before, but for how quick and simple it is, I really like it. Mark Bittman's cookbook "How to Cook Everything Vegetarian" really does live up to its title. I can always find a simple, delicious recipe for just about anything I feel like cooking up.


This time, I used savoy cabbage but you can use any type of cabbage for kimchi. I also just estimated on the other ingredients because I was making a small batch. Bittman uses green onions in his recipe, but I used a shallot instead because that's what I had.

Ingredients:
Cabbage separated into leaves
Coarse salt
Soy sauce
Minced garlic
Minced shallot/green onion
Red pepper flakes
Sugar

First, layer the cabbage leaves in a colander and sprinkle salt on each layer. Put a bowl under the colander to collect water. Place something on the cabbage to weigh it down so that any excess water drips out. Let it sit for a couple hours until the cabbage is wilted, then rinse thoroughly and chop the cabbage.

Make a sauce with the rest of the ingredients in a bowl. Then pour the sauce on the cabbage, mix it all together and it's ready to eat. Put it in a jar and it will keep in the fridge for up to a week.

Saturday, January 23, 2010

Grilled sandwiches are amazing.


I have always been a huge fan of a nice grilled sandwich. It's my ultimate comfort food. Ok, it's not the healthiest meal... but I just love a good melty vegan grilled sammy. Today, I bought some olive bread from the Scottsdale Farmer's Market along with tomatoes from McClendon's Farms. Put it together with some Vegenaise and vegan cheeze and you have a delicious lunch. (Today I used Follow Your Heart brand Mozzarella style. It's not quite as melty and good as my favorite-- Daiya-- but easier to find at most supermarkets. I also buy Earth Balance vegan margarine. mmm... buttery.)
(Shred the cheese with a fine shredder and it melts easier than if you slice it.)

Grill em up!

Thursday, January 21, 2010

Gallo Pinto (sorta)

Gallo Pinto is a typical staple food of Costa Rica. It's pretty much just rice and beans... which I love! This is my simple variation using black beans and brown rice. In Costa Rica, gallo pinto is eaten daily and often with breakfast. This version is just "sorta" like gallo pinto, because no matter what it just doesn't taste the same as it does there. (It doesn't help that it's missing the key ingredient-- Salsa Lizano). But I like it because it's tasty, simple, and healthy.

Ingredients:
Brown rice
Black beans
Diced Onion (1/2)
Minced Garlic
Diced Red pepper (1/2)
Cilantro
Oil (2 tbsp)


First, cook the rice and beans separately and set them aside. Then oil a skillet and saute the rest of the ingredients for a couple minutes. Then add the rice and beans to the skillet. You should save some of the bean-liquid to add to the mix. Pretty much just mix it all together and let it all cook together for a minute and you're done! I didn't include exact measurements because it's really just about personal preference. And save some fresh cilantro to sprinkle on top.


Monday, January 11, 2010

Chickpea cutlets

This is a recipe that I love from the "Veganomicon" cookbook by Isa Moskowitz and Terry Romero. Great cookbook.


These chickpea cutlets have vital wheat gluten in them, so they have a stringy-chewy-meaty texture that I really enjoy. I made these on Thanksgiving and they were a big hit. I tried to follow the recipe closely to how it is in the book, but i'm not very good at that. So it's a bit different.

Ingredients:
1 cup cooked chickpeas

2 tbsp olive oil
1/2 cup break crumbs

1/4 cup water

2 tbsp soy sauce
2 cloves minced or grated garlic
dried thyme

smoked paprika

dried sage

olive oil for pan frying


(To make the bread crumbs, I just put a couple slices of sandwich bread in the food processor and pulse until crumby. No need to buy bread crumbs.)

First, mash the garbanzo beans and oil in a mixing bowl until there are no whole chickpeas left. (I got a little impatient and left some whole.... which is OK but they will fall off when you fry them. oops.) Then add the rest of the ingredients in the bowl and mix together. Knead the mixture for about 3 minutes and it will start to get stringy due to the wheat gluten.

Now you're ready for frying. Just put a little olive oil in the pan and form patties with the mixture. Make sure they're not too thick or the inside won't cook. Fry on each side for about 6 minutes-- not too high, because you don't want to burn your cutlets. When they are done, they should be pretty firm to the touch. Place cutlets on a paper towel to soak up excess oil while they cool.


Next time, I'm going to try baking them instead of frying. (20 minutes at 375 brushed with a little oil, then flip and bake for an additional 8-10 minutes until firm and golden-brown).

I must admit that my cutlets
look pretty "rustic"...... yeah the picture in the cookbook looks slightly better! Whatever, I'm not a professional and they taste great!

Saturday, January 9, 2010

Saturday lunch: braised greens and quinoa

For lunch today I made braised greens, which I served with red quinoa, garbanzo beans, and tomatoes. I had the quinoa and garbanzo beans left over from the day before and it went great with the greens. Sometimes it's nice to make a little batch of quinoa or brown rice, and then just put it in the fridge to have around for a couple days. Rice and beans is one of my favorite things to take to work for lunch, and I love to try out different variations.

The greens were an organic mix that I picked up from the McCeldons Farm stand at the Scottsdale Farmers Market. I started with a little oil in the pan, and sauted the greens for a couple minutes.

Then, I added about a cup of vegetable stock and let simmer (covered) for 12 minutes or so.

I use a concentrated vegetable stock called "Better Than Bouillon"-- just mix a little in hot water and it's ready (it stores well in the freezer and lasts forever).

When they were nice and tender I just drained the greens and they were ready to serve.
Healthy! And tasted great too. (and notice the hummus at the top of the plate-- had to sneak it on there!)

Wednesday, January 6, 2010

Finally: Super Creamy Hummus


I got an awesome gift for Christmas from my parents: a pressure cooker! I'd been hearing that the best way to get hummus truly creamy (restaurant-style) is to first cook the beans yourself, and then remove the skins from each bean. Sounds like a lot of work, but I get a lot of satisfaction out of making amazing food for myself that tastes better than a restaurant. SO worth it! I have tried making my own hummus a million times with canned-beans, but it just wasn't cutting it. It doesn't give you that yummy creaminess like the kind you buy or get at a restaurant. Also, there is a huge difference in taste. I got some dried chickpeas from the Scottsdale Farmers Market on Saturday and they had so much more flavor than any canned beans i've ever had! Amazing! So now that I have a pressure cooker, I'm ready to see for myself if I can make the best hummus I've ever had.


If you don't have a pressure cooker, you can cook your own beans on the stove top. But they have to cook for 3 hours. Yeah.

I kept this batch very simple. Sometimes I like to add artichoke hearts/palm hearts, olives, roasted red pepper, or spiciness. This time I just wanted some damn creamy hummus!

*Disclaimer: I'm not big on exact measurements when it comes to things like dips and sauces. And pretty much everything else. But I'll try. Feel free to adjust any recipes as you see fit!

Ingredients:
1 1/2 cups garbanzo beans (cooked amount)
1/2 tsp salt
1 tbsp minced garlic
1/4 cup tahini
3 tbsp Olive oil

To cook beans on the stove-top: Soak them first, then cook for 3 hours on the stove. The water should be at least 1 cup beans/3 cups water.
To cook beans in a pressure cooker: Unsoaked beans' cook time is 32 minutes, plus about another half hour for the pressure to release naturally.
Ok fine, you can also just use canned beans. And it'll be decent. But I'm aiming for perfection here.

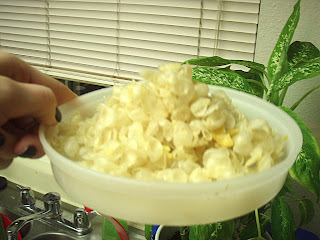
Next, rinse the beans under cold water and then take the skin off each individual bean. Yes, it takes some time. But it was kinda satisfying. I stopped when my fingers were really shriveled and that was about 1 1/2 cup of beans. But seriously, you have to skin the beans! Do it. So creamy.


Then, I load the skinless beans into my food processor and add the garic, salt, olive oil, and tahini. Let the food processor do its magic (about 30 seconds). And there you have it: awesomely creamy hummus. YUM!

Welcome to my Blog!


Hello, Internet! This is my first blog post, ever. Heeeey! I've been thinking about writing a food-oriented blog for a while now, and of course it must be vegan because it's me. So I finally went for it, and I'm planning on bringing you lots of delicious vegan recipes, product reviews, and ideas for the kitchen. Thanks for stopping by!